Pages navigation

GOLD!

Lately I got quite drowned to my "big magnets" thing... if only I had any place left on my fridge...
This time I've come up with something a bit different. It all started when I tried to buy some stuff on eBay for nail art. This is always fun, there are so much cool things out there, I always want them all,
and promise myself not to be lazy and actually use them afterwards....well not always happens :/.
So I stumbled upon this cool super thin tape:


Indeed I did not use it for my nails but this is what I did use it for:


A bit of the making process:
I made a bunny silhouette out of a gold paper and glued it to magnet paper.

Here is how I used the tape above:

Then just applied some color on it:

Then - THE most fun part, gently remove the tape:

 And it is done!

One More

Hi there!

Made a new Fridge big magnet for a friend (I wish I had many many fridges in my home so I could make big magnets as much as I want :)).

It took a while to make this one, and I'll share the making process. First, this is the final result:


And here is the making process:
First I had to sketch the bunny. Then to transfer it (in a bigger size) to the canvas. I redrew it on pergament paper so it would be easy to copy. The next step is to draw the flowers. The drawing technique is called "one stroke" and I'm in love with it. The last step was to glue the canvas to the magnet sheet, and to cut accurately.


And that's it!


Lights On!

I was doing some house cleaning when I stumbled upon a small flashlight which I bought for my bike. My cat as usual came by to see whats going on... Very quickly it got seriously interested.
And I, as always, took my phone and right away entered the paparazzi mode. Then I noticed that with the right angle I can get some interesting pics.
And so this is what we've got:


I like the result mostly because of the simplicity - phone camera, flashlight and that's it, you just have to play with the shadows (which is really fun!). Enjoy making yours!
Olga.

Craft Fair (and I'm not the buyer this time)

I was always curious about people's response to my pieces and designs. For me the most exciting moment is the one when I just complete a project, and it is ready to show off! So far what I did was showing it to friends and making them say nice things about it. (just kidding...they said nice things because of their own free will!).

Some time ago I had a thought about presenting my work to an audience of people which don't know me. So I came up with an idea to take part in a craft fare.
Now, this is a totally different experience. When publishing on social media you get to see only the likes, but you never see the reaction itself. When actually standing there behind all your goodies, you can see what people really think of it.

The most interesting part is to watch people's reaction during that very short period while they "scan" the piece with their eyes. This is the moment you unconsciously hold you breath and observe.
I must admit you feel much more exposed, but there is something very cool about it.

So the fair took place in a very small hangar, with very simple old fashioned design. It didn't get any major publicity, and so was not crowded at all - nothing fancy. But since it was my very first experience I was excited as a little kid. After all it took me a month of sleepless (but fun) nights of preparation (along with my full time job).

This is how my table looked like:


I had some little canvases, few big fridge magnets and an old record. All hand painted. The background is a simple bristol which I painted with chalk to create a chalkboard look.

I wanted people to somehow remember my slowly emerging brand, and so I had to make some "business" card. I wanted people to really notice and take them, so here they are - because no human can refuse a candy right?


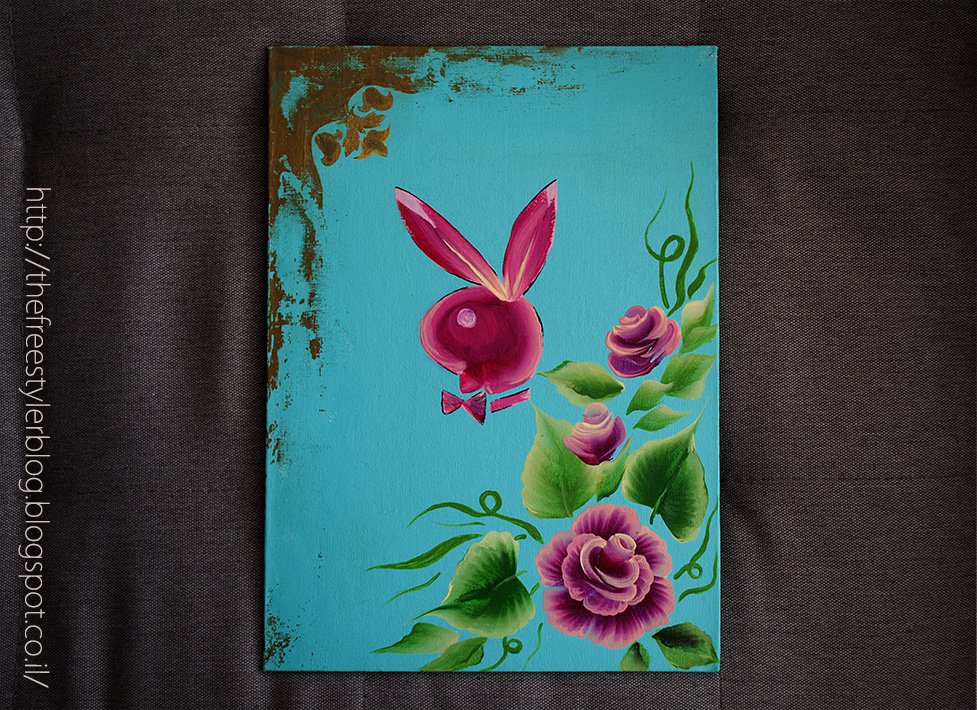
The pieces are painted with acrylics, here is some better view:


Some magnets:


This is just me trying to take a selfie with my booth. How could I not?


And before I end - this is my big mess in my small apartment during the preparation. The cat helped a lot  ;-)

So to sum it up, it was a nice experience, will definitely do it again sometime.

Olga.


10x10


Well, this post is gonna be looong. Not because of the text, but because of the images! Here are some of my new projects. All are hand made with little 10x10 canvas frames, acrylic and love :) Enjoy:


And this is how it looks on my wall:

Olga.

Another dressed fridge

Hi there,

Recently I got a little fetish for making stuff for fridge doors.
It all started with a the cat idea where I made a big cat pattern out of wallpaper, which turned out to be one of my favorite: http://thefreestylerblog.blogspot.co.il/2015/01/my-cat-fridge.html
Continued with another one, where I turned a piece of cloth into a fridge upper door cover: http://thefreestylerblog.blogspot.co.il/2015/02/first-we-eat.html

This time, I wanted it to be just a magnet. But a big one, so it would be more of a jewelry rather than notes holder.

I ended up with a bunny full of flowers:


Play!

So, I sat all day and drew this to a friend of mine.


Hope she'll like it.

A bit on the making process:
Flowers:
One stroke painting technique (see my other post for more details http://thefreestylerblog.blogspot.co.il/2015/02/phones-and-roses_16.html)


Bunny:
 Well...just drew it.

Vnitage Frame:
This one has a story.
First I painted kind of big bold frame. The moment it was finished I hated it so much!


Then came the big regret...why the heck did I need to do it??
And then...I remembered that acrylic paint can be washed. I took some wet wipes and started to gently scrub the part I didn't like.


I was determent to remove it completely, but then in the middle of the process I saw that if I remove only a part of it, it turns out quite cool - I get kind of "pixelized" texture (because the canvas itself has a texture)


I liked how it turned out, so I decided to do this for the entire frame.


So I learned two things out of this experiment. First, you can always correct your acrylic painting (eg. with wet wipes), second you can create artificial vintage/pixelized texture by removing paint partially.

Enjoy.